こんにちは。ネイティブアプリエンジニアの杉山です。
今回は、アニメーション付きグラフを作成するという小ネタを書いていきます。
今回作るもの
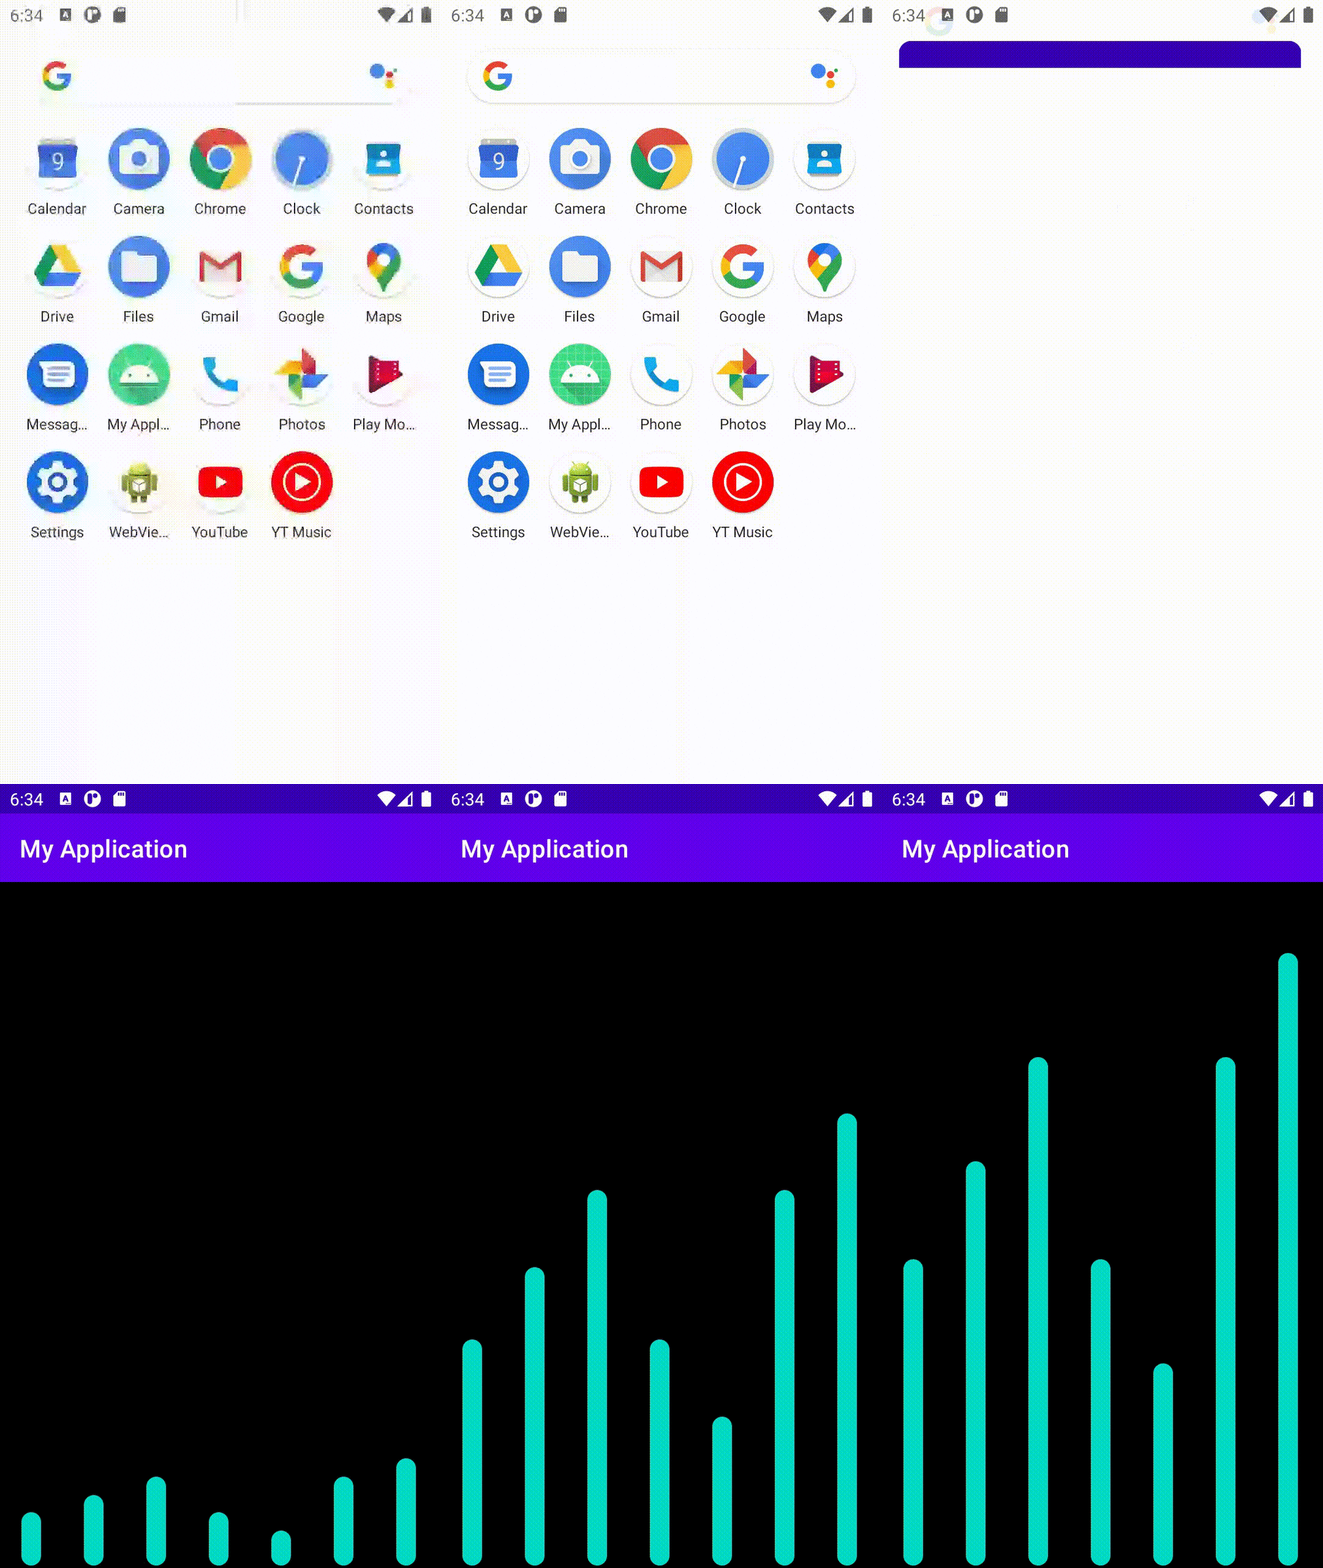
項目が下から「にゅ〜ん」と伸びてくる棒グラフ
レイアウトファイルを用意する
以下のレイアウトファイルを用意していきます。
・ベースとなる画面のレイアウト
・グラフアイテムのレイアウト
ベースとなる画面のレイアウトファイルには、RecyclerView だけを記述しておきます。
<androidx.constraintlayout.widget.ConstraintLayout
    xmlns:android="http://schemas.android.com/apk/res/android"
    xmlns:app="http://schemas.android.com/apk/res-auto"
    xmlns:tools="http://schemas.android.com/tools"
    android:layout_width="match_parent"
    android:layout_height="match_parent"
    tools:context=".MainActivity">

    <androidx.recyclerview.widget.RecyclerView
        android:id="@+id/graph_recycler"
        android:background="@color/black"
        android:layout_height="match_parent"
        android:layout_width="match_parent"
        app:layout_constraintStart_toStartOf="parent"
        app:layout_constraintTop_toTopOf="parent"
        app:layout_constraintEnd_toEndOf="parent"
        app:layout_constraintBottom_toBottomOf="parent"/>
</androidx.constraintlayout.widget.ConstraintLayout>
グラフアイテムのレイアウトファイルを用意します。
こちらは単純に View を記述するだけです。
横幅などは、お好みで設定してください。
<androidx.constraintlayout.widget.ConstraintLayout
    xmlns:android="http://schemas.android.com/apk/res/android"
    xmlns:app="http://schemas.android.com/apk/res-auto"
    android:id="@+id/graph_item_layout"
    android:layout_width="wrap_content"
    android:layout_height="match_parent">

    <View
        android:id="@+id/graph_item_view"
        android:layout_width="16dp"
        android:layout_height="1dp"
        android:layout_marginBottom="4dp"
        app:layout_constraintStart_toStartOf="parent"
        app:layout_constraintBottom_toBottomOf="parent"
        app:layout_constraintEnd_toEndOf="parent" />
</androidx.constraintlayout.widget.ConstraintLayout>
ロジック作り
最初にアニメーションクラスを作っておきます。
ベースの高さから指定した高さに変化させていくというものになります。
class HeightAnimation(var view: View,
                      var startHeight: Int,
                      var targetHeight: Int) : Animation() {

    override fun applyTransformation(interpolatedTime: Float,
                                     t: Transformation) {
        val newHeight =
                (startHeight + (targetHeight - startHeight) * interpolatedTime).toInt()
        if (newHeight == 0)
            return
        view.layoutParams.height = newHeight
        view.requestLayout()
    }
    override fun initialize(width: Int,
                            height: Int,
                            parentWidth: Int,
                            parentHeight: Int) {
        super.initialize(
                width,
                height,
                (view.parent as View).width,
                parentHeight)
    }
    override fun willChangeBounds(): Boolean {
        return true
    }
}
ベースとなる画面の Activity にて、最終的にグラフとなる RecyclerView の設定を行います。
view bind は、公式推奨の形式で行っております。
binding.graphRecycler.run {
            this.layoutManager =
                LinearLayoutManager(context, LinearLayoutManager.HORIZONTAL, false)
            adapter = GraphRecyclerAdapter()
        }
次に Adapter クラスを作成します。
今回は、アイテム数を 7 としました。(特に意味はありません。。)
class GraphRecyclerAdapter: RecyclerView.Adapter<RecyclerView.ViewHolder>() {

    override fun onCreateViewHolder(parent: ViewGroup, viewType: Int): RecyclerView.ViewHolder =
            GraphViewHolder(LayoutInflater.from(parent.context).inflate(R.layout.graph_item, parent, false), parent)

    override fun onBindViewHolder(holder: RecyclerView.ViewHolder, position: Int) {
        (holder as? GraphViewHolder)?.configure(position)
    }
    override fun getItemCount(): Int = 7
}
最後に ViewHolder で、グラフアイテムの設定を行います。
ここで最初に作成したアニメーションクラスを設定していきます。
他はコード内にコメントを記入したので、そちらをご覧ください。
背景の設定などをコードで行っておりますが、Drawable にリソースファイルを作って指定していただいても構いません。
class GraphViewHolder(private val containerView: View,
                      private val parent: ViewGroup) : RecyclerView.ViewHolder(containerView) {

    private val binding: GraphItemBinding
        get() = GraphItemBinding.bind(containerView)

    private val context = containerView.context

    fun configure(position: Int) {
        // グラフに表示する値
        val list = arrayListOf(30, 40, 50, 30, 20, 50, 60)
        // リスト内の数値を最大値をベースとした割合に換算
        val customList =
            list.map {
                ((it.toDouble() / (list.maxOrNull() ?: 0)) * 100).toInt()
            }
        // アニメーション後のグラフの高さ
        val graphValue = customList[position] * 20
        // 横幅を設定
        setWidth()
        // グラフアイテムの設定
        binding.graphItemView.run {
            // 背景色、コーナーなどの設定
            background = getBackgroundInfo()
            // アニメーション追加
            val heightAnimation = HeightAnimation(this, 0, graphValue)
            heightAnimation.duration = 2000
            this.animation = heightAnimation
            }
    }

    private fun setWidth() =
            (binding.graphItemLayout.layoutParams as ViewGroup.MarginLayoutParams).run {
                width = parent.measuredWidth / 7
            }

    private fun getBackgroundInfo(): Drawable {
        return GradientDrawable().apply {
            shape = GradientDrawable.RECTANGLE
            cornerRadius = context.resources.getDimension(R.dimen.corner_radius)
            setColor(ContextCompat.getColor(context, R.color.teal_200))
        }
    }
}
これで完成!!!

最後に
今回作成したものをベースにカスタマイズしていけば、結構遊べると思います。
簡単な小ネタになってしまいましたが、記事を読んでいただきありがとうございました!